
The easiest way to make new gym software fail is to spend three weeks preparing the perfect migration. Staff keep using the old register while someone cleans an endless spreadsheet, and the new system becomes another place that is almost correct.
To set up gym management software successfully, configure the gym and plans first, add the active members you need now, define staff permissions, test five daily workflows, and choose one clear go-live date. Historical records can follow only when they are reliable and useful.
The short answer: Your first goal is not a complete archive. It is one working day in which every new member, payment, renewal, and attendance record goes into the new system correctly.
This first-week plan is designed for an independent gym moving from a register, spreadsheet, or another platform.
Before day one: decide what success means
Write down the five questions the new system must answer:
- Which memberships expire soon?
- Who has a pending balance?
- What did the gym collect today?
- Who attended?
- Which lead or member needs a follow-up?
These questions become your acceptance test. A setup is not complete because every field has a value. It is complete when the team can answer the important daily questions from one trusted place.
Also choose one owner for the rollout. This person decides field definitions, resolves duplicate records, and confirms when the team stops writing new activity in the old system.
Day 1: configure the gym, plans, and rules
Start with the structure that every member record will use.
Gym details
Confirm the gym name, contact details, time zone, currency, tax information, and receipt details. A spelling error here may repeat across every document generated later.
Membership plans
Create only plans you actually sell. For each plan, define:
- Clear plan name
- Duration
- Standard price
- Tax treatment
- Joining or registration fee, if used
- Freeze policy
- Any visit or session limit
Avoid names such as “Plan 1” or “Offer.” A member, receptionist, and accountant should understand the plan without asking the person who created it.
Payment methods
Set the methods your gym really accepts, such as UPI, cash, card, and bank transfer. Decide how partial payments and due dates will be recorded. The rule should be the same for every staff member.
Day 2: clean the active member list
Do not copy every record just because it exists. Start with members whose plans are active, expiring soon, frozen, or carrying a real balance.
For each active member, prepare:
- Full name
- Mobile number
- Plan
- Start and expiry dates
- Amount paid and amount still due
- Freeze status, if applicable
- Assigned trainer, if the gym uses this
- Notes that are current and appropriate to retain
Remove obvious duplicates before import or entry. Keep the best phone number and confirm conflicting expiry dates from payment evidence rather than guessing.
What about old members?
Archive reliable historical records only when they support a real purpose, such as win-back follow-up, financial history, or a membership dispute. Do not mix stale contacts into the active list.
What about payment history?
Keep legally and operationally required financial records, but do not invent transaction-level detail from an opening balance. If you only know that a member owes 1,500 rupees, record the opening balance honestly and preserve the source file separately.
Day 3: import or enter members
If the software supports bulk import, test a small sample before uploading the full file. Check date format, phone numbers, plan mapping, status, and balances. A successful upload is not proof that the records mean what you expect.
If bulk import is unavailable, enter the active list in priority order:
- Members expiring in the next 14 days
- Members with pending balances
- Frozen members
- Other active members
- Useful historical records
This order makes the system operational before the data entry is complete.
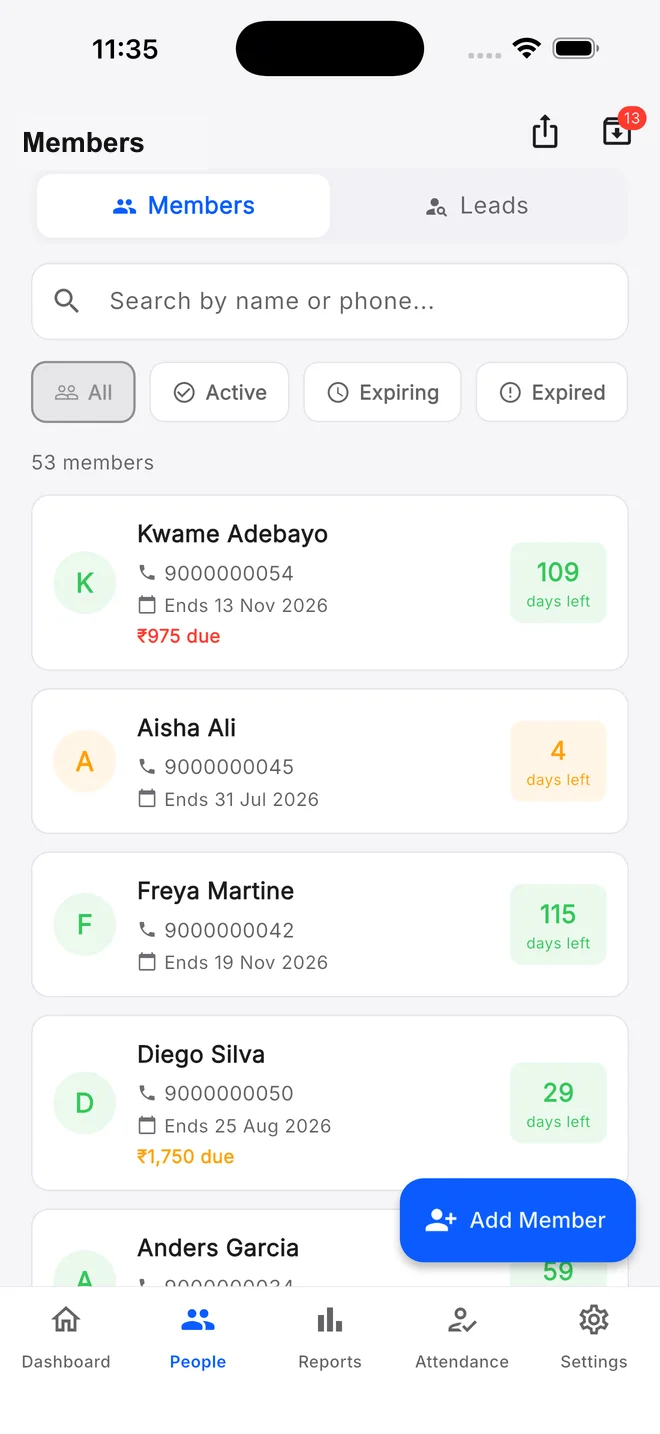
Gym Ledger currently adds members through the app and does not offer bulk import. It can export member data to Excel. For a large existing list, plan the entry work before choosing it, or ask support what onboarding help is available. That limitation should be part of the buying decision, not a surprise during setup.
Day 4: create staff accounts and permissions
Do not begin with one shared owner login. Give each staff member an individual account and only the permissions needed for their role.
| Role | Usually needs | Usually does not need |
|---|---|---|
| Front desk | Find members, add members, record attendance, record approved payments | Full financial reports, owner settings, staff administration |
| Trainer | Assigned members, attendance, personal training sessions | Gym-wide payments, exports, owner settings |
| Manager | Operational reports, member updates, leads, selected financial views | Subscription ownership, unrestricted security settings |
| Accountant | Required financial reports and exports | Member editing, attendance, lead management |
Test every role by signing in as that role. A permission matrix on paper is not enough if the actual screen reveals more than expected or blocks normal work.
Use the detailed gym staff permission guide as a starting point.
Day 5: test the five workflows that cannot fail
Use test records, not a real member’s payment, while learning.
Workflow 1: New member
Add a member, assign a plan, record the payment, and verify the expiry date and receipt.
Workflow 2: Partial payment
Record part of a fee, set the remaining amount, and confirm that the pending balance appears in the right views.
Workflow 3: Renewal
Renew an expiring membership and check that dates, payment history, and status update correctly.
Workflow 4: Attendance
Mark a manual check-in and, if used, test the member QR or supported biometric workflow. Confirm that the visit appears in the member history and attendance report.
Workflow 5: Correction and export
Correct an intentional mistake using the product’s supported process, then export the relevant report. Staff should know how errors are fixed before a busy day creates one.
Day 6: train staff with scenarios, not a tour
A feature tour is easy to forget. Give each role the situation they will actually face:
- “A member says they paid half yesterday. Show me the balance.”
- “This plan expires in three days. What is the next action?”
- “The QR code did not work. Mark attendance correctly.”
- “A walk-in wants a trial tomorrow. Record the follow-up.”
- “A payment was entered against the wrong member. What do you do?”
Ask the staff member to complete the task without prompting. Any hesitation is a setup or training problem to fix before go-live.
Day 7: go live and stop double entry
Pick a specific opening shift. From that point, all new members, payments, renewals, and attendance go into the new system.
Keep the old register or spreadsheet read-only for reference. Do not continue entering new activity in both systems for weeks. Double entry creates two versions of truth and guarantees a reconciliation project later.
At the end of the first day, verify:
- New members match actual joins
- Collections match payment evidence
- Pending balances are explained
- Attendance looks plausible
- Staff used their own accounts
- Every exception has an owner
Repeat the check after the first week, then decide whether more historical data is worth adding.
Common setup mistakes
- Importing duplicates without testing a sample
- Treating an opening balance as a detailed payment history
- Copying expired and unreliable records into the active list
- Giving every staff member owner access
- Creating too many membership plans
- Going live without testing corrections
- Running old and new systems in parallel without an end date
- Measuring completion by records entered rather than workflows working
A downloadable setup checklist you can copy
Use this as the final sign-off:
- Gym, tax, contact, and receipt details are correct
- Every active plan has the right duration and price
- Active members have verified dates and balances
- Duplicate members are resolved
- Staff have individual accounts and tested permissions
- New member, payment, renewal, attendance, and correction workflows pass
- Reports trace back to the correct records
- The go-live date and owner are clear
- The old system is read-only for new activity
- First-day and first-week reviews are scheduled
If you are still choosing a system, use the gym management software buying guide. If you are moving specifically from paper or spreadsheets, follow the register-to-software migration guide.
Frequently asked questions
How do I set up gym management software?
Configure gym details and membership plans first, add the active members you need now, create individual staff accounts with limited permissions, test the five daily workflows, and choose one clear date when all new activity moves to the new system.
How long does gym software setup take?
The basic configuration can take less than a day, but the real timeline depends on member count, data quality, staff training, and whether bulk import is available. A small gym should prioritize a correct go-live over a complete historical archive.
Should I import every old gym member?
No. Start with active, expiring, frozen, and genuinely due members. Add reliable historical records only when they support a clear purpose such as financial history, win-back follow-up, or resolving a membership question.
Should staff share the gym owner’s software login?
No. Each staff member should have an individual account with only the permissions needed for the role. This reduces unnecessary data access and makes changes attributable to the person who performed them.